Saturday, March 17, 2018

Valentine cards, Digital paper thank you cards

Happy St. Patrick's Day! 💚🍀

And here I am, sharing Valentine's Day cards.  😜
I made them for 2017, so I am late in sharing.

The first was really simple to create, using fancy patterned paper (can't recall which one I used), a stitched heart die cut from pink glitter paper, and a stamped arrow which was cut in half and reassembled on the two sides of the heart.


The one below in shades of purple, silver and cream was for my oldest daughter, who loves all things sparkly.


My youngest daughter has a more streamlined vibe about her, and though she isn't as crazy for sparkles, I did use mint patterned paper that has silver polka dots on it, and used a die cut silver glitter heart as well.  I kept the design of the card to a spare design, though.  The sentiment and scroll are from Avery Elle's More Stories stamp set.


The purple Valentine below was for my honey.  Purple is his favorite color (besides Philadelphia Eagles green!), and I created a little scene.  Just two cats hanging out in a basket, loving each other. 😊 The cats and sentiment stamp are from My Favorite Things Cool Cat stamp set.


While I had the Cool Cat set out, I made a card for the shop, using some funky patterned papers, cocoa velvet ribbon, and a shining sun (My Favorite Things).


And finally, a couple of creations made with sweet digital patterned papers and elements that my aunt sent to me.  Aren't they cute?


That's it for today!  God bless you!

Friday, March 16, 2018

Easter and more!

Hello!  Sooooo glad the weekend is here!  Wishing you an early Happy St. Patrick's Day, too.
Believe it or not, we're heading for a Mexican restaurant tomorrow, and staying clear of the Irish pubs. It gets a little wild in there on this Irish holiday!

I've got a bunch of cards to share today, including several Easter cards.

Here we go:

The first one has a Chocolate Bunny die from Memory Box, cut from dark brown damask paper.  He's so pretty!  I die cut two wreaths using the Memory Box / Poppystamps Breezy Wreath die. I layered them together, and let the top one hang over the edge a bit, then added some pearls.  The paper is by Prima, I think.  The stamped 'Easter Greetings' sentiment is from Flourishes He Is Risen set.


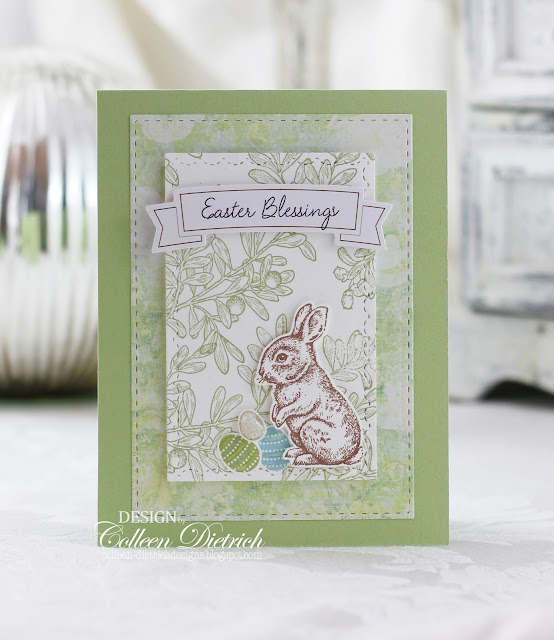
The Baby Bunny below is from Inkadinkado; the sentiment is from Wplus9's Easter Blessings set.


Up next:  a polka dot thank you card using patterned paper from Papertrey Ink.


The little strip of cardstock beneath the book page pattern paper is a dull golden shimmer; it matches the polka dot paper quite well.  The felt flowers are from Stampin' Up! from years ago.  The bold sentiment is from My Favorite Things All Occasion Sentiments.


Next up, two sprigs of moss green die cut leaves (My Favorite Things) are tied with gold/cream twine on this soft monochromatic birthday card.  The sentiment is from Papertrey Ink.


On this sympathy card, the dry embossed panel, and the die cut butterfly, were in a Stampin' Up! Scrap Bag.  They're beautiful, even more so in person.  My demonstrator used gold embossing powder, I believe, on that embossed panel.  Hard to see it in the photos.


Below, the spring birthday sentiment is from Papertrey Ink's Spring Hills set.  I tucked a little scrap of lace behind the sentiment tab, and added a little rhinestone there, too.


Another Easter card below, using Avery Elle Happy Spring stamp set for the sentiment, tan stamped wreath, and tone on tone rosy red silhouette bunnies leaping across the bottom of the card.  I die cut a Memory Box / Poppystamps Breezy Wreath and layered it outside the sentiment circle.


These gold-embossed flowers and the dry embossed panel were in a Stampin' Up! Scrap Bag.  I topped the panel with some lace, a paper gardenia, pearls and scattered sequins.


Next is a psychedelic card.  Look at that crazy Stampin' Up! patterned paper!  Found it in a scrap bag, and challenged myself to use it in some way.  I pretended it's kitchen wallpaper LOL, and set a teapot scene in front of it.


I had two flowers already punched out - one in shimmery white, the other in mirror gold- and added them to the teapot.  The pot sits upon a doily die cut from white cardstock, and that in turn is atop a rosy coral hued 'tablecloth'.


The card below was a Valentine for my husband in 2017.  Something different!  I used the bear from Essentials By Ellen All Inside stamp set, a bee from Avery Elle Storybook, and a ransom-style sentiment from Blockheads Paper Arts ATC Honey Bees.  The trees are stickers from Jolee's Boutique.


The grass is greener where this bear stands!  It feels good too, in such a beautiful shade of green felt.


This little guy got a shiny nose, thanks to some Glossy Accents glue.


Thanks so much for coming by today.  Time to go for a walk with my favorite guy. Have a wonderful weekend!

Saturday, March 3, 2018

A Mixed Bag of Cards

Hello, friend!

I hope you are well today.  What are your plans for the weekend? We've had a nor'easter storm that hit us yesterday, and it's still quite chilly here today, which makes it a perfectly cozy and lovely day to stay inside. I've got the usual list of laundry and cleaning to tackle, and will also be putting away some snowmen decorations (yes, they stay up long after Christmas; they're my winter friends!) and bringing out St. Patrick's Day decor.

I have several cards to share today, no particular theme...


I had to have the My Favorite Things Bundle of Baby Clothes set, which came out in 2017. Cute, cute, cute little sweet things to hang on a laundry line! The sentiment is from MFT's Welcome Baby stamp set.


How cute is this bear from Essentials By Ellen's All Inside??  Love him's little face! I gave him a balloon to hold from an Avery Elle set.


Also had to have the My Favorite Things Cup of Tea stamp set, along with the MFT Tea Party die set. Such endless possibili-teas between the two!  (sorry, couldn't resist that pun)


This simple cross card is a sympathy card, using the Spellbinders Crosses Two die, cut from shiny gold mirror cardstock, and topped with a pearl.  I also die-cut the cross from white craft foam, and gave it some elevation.


The card above is dotted with wooden flowers (Studio Calico, which are topped with white enamel dots I made myself using Tonic's Nuvo Drops.  When they were dry, I glued those dots onto the flowers. Vintage thread hangs from the tag, and I glued it into place carefully.

I love this stamp from Verve, called Grace. The quote from Anne Lamott, "Grace...meets us where we are but does not leave us where it found us," speaks of God's truth, His grace and His mercy. We do not need good works in order to be saved, but the Lord takes us as we are, and transforms us from the inside out in the image of Christ.


This last card is super simple, and uses a rose-filled heart stamp from Flourishes' Hearts and Flowers stamp set. I left it black and white, choosing not to color it in so that it has a more modern, clean feel to it. It's propped up with foam dimensional tape behind it, on a gray patterned paper that has been cut with a scalloped rectangle die cut (My Favorite Things). The sentiment is from Papertrey Ink's The Skinny stamp set.

That's it for now!  Will try to get more card photos edited so I can blog again soon, but my daughter starts having regattas (she's on the high school Crew / rowing team) in just a couple of weekends, and our lives will be a whirlwind once more.

Until we meet again, God bless you and thank you for your visit!

St. Patrick's Day

Hello! It was SO nice to hear from my stamping friends again, after my recent posts. I have missed this wonderful group of ladies! Thank you so much for your kind words!

Today I'm sharing several St. Patrick's Day-related cards. 


In the card above, it was hard to photograph that golden circle behind the big shamrocks. It looks like a weird color in the picture, but it's a shiny mirrored finish.  Much easier to see in real life. Also, the dark green shamrocks look black here.  LOL 


Those pale green flower petals are silk, and I just glued them down atop hand-drawn 'stems', then topped the center of each shamrock with a pearl.

Thanks so much for your visit today!  May God bless you richly!

Psalm 115:14-16 New Living Translation (NLT)

 May the Lord richly bless
    both you and your children.
 May you be blessed by the Lord,
    who made heaven and earth.

The heavens belong to the Lord,

    but he has given the earth to all humanity.

Thursday, March 1, 2018

A 'Colleen Bow' Tutorial

Hello there!  Today, I'm showing you "How To Make A Colleen Bow."  There's no great magic trick, but I'd love to share my technique with you anyway.  ;-)


First, get your card base ready.  I used two patterns from the Vintage Digital Paper pack.  Sigh!  Love them.


Seam binding is my favorite ribbon for making my 'special brand' of bow.  It's very flexible and soft and drapes well.  Cut enough ribbon to go around the front of your card and begin to tie a bow, then STOP.   Set it aside.


Cut another length of ribbon (I used approximately 8-10") and make a bow using the Bunny Ears method.  Make two loops.....


Action shot here!  Sorry for the blur.  The camera was set on a timer.  Fold one loop over the other, and pull through the resulting hole.


Tighten the loops and adjust each one until they are a length you like.  Now, take this bow over to your card and......


....lay it on top of the half-tied bow.  Hold the Bunny Ear bow in place until you can grab the ends from the half-tied bow.


Finish tying that first bow, right on top of the Bunny Ears bow.


The tails are pretty long at this point, and will need trimming.


The four tails are visible best in this photo below.  Trim each one as needed, and place a small dab of craft glue under the bow's center to adhere to card base.


Here's the finished bow, on a Christmas card.


Because the papers and colors are so non-traditional for Christmas, I added some snowflakes -- with pearls -- to make it feel more festive.  Snowflakes and roses?  Sure, why not!


For my sentiment panel:  on a piece of white cardstock, I stamped a frame from Festive Frames in kraft ink, then laid a Fancy Labels 2 die over top of it.  Pink Gingham Washi Tape helped hold my die in place while I ran it through my Big Shot.


The sentiment is also from Festive Frames.  I used shiny gold foil cardstock with the next largest die to create a panel behind it.  Love how that turned out!


And that's it!  Thanks for your visit!

Related Posts Plugin for WordPress, Blogger...